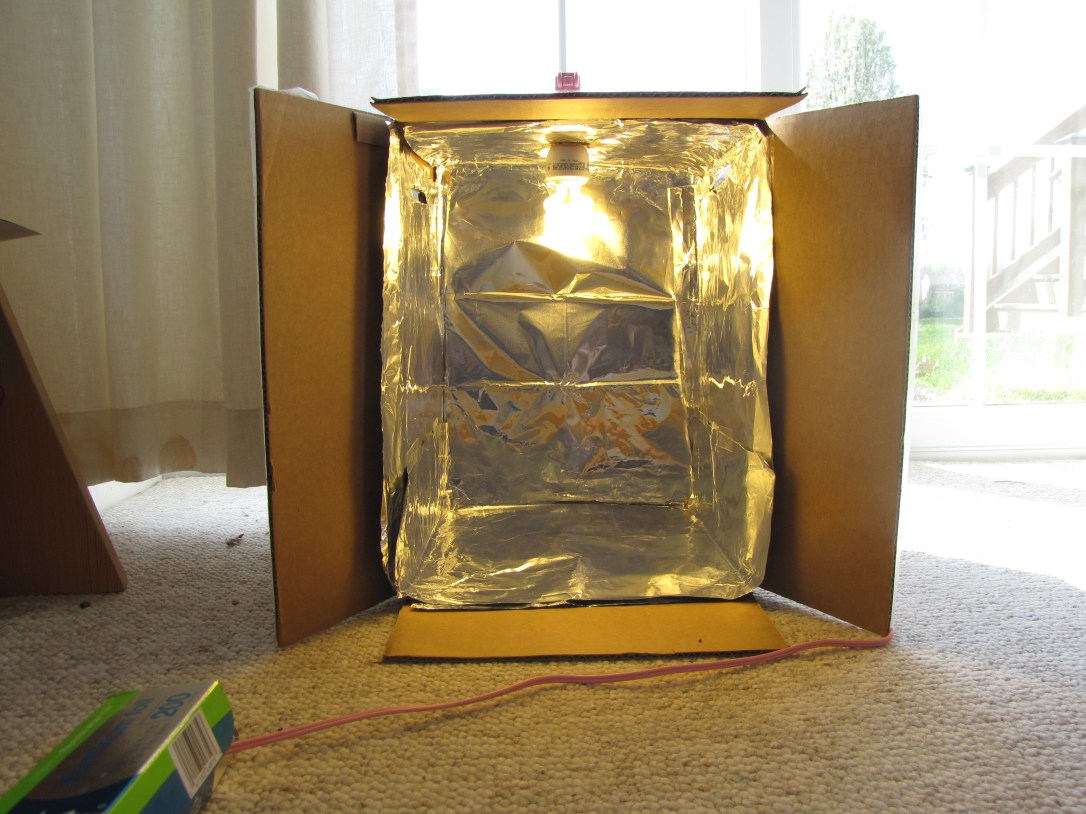
I can’t take credit for this idea. Our science book for homeschool last year, Apologia’s Exploring Creation With Botany by Jeannie K. Fulbright, included instructions on how to create this as its first lab/activity. I knew as soon as we put this together at the beginning of the school year that I would be using it again in the spring for my seedlings! Last year’s did get a little mildewed by the end of the season (what with all the watering that was going on,) so I made a new one this year (pictured here.) It’s assembly is pretty straight forward, and all the supplies can be easily picked up from your own stash or at a hardware store. Best of all, it works! My little sprouts were healthy and happy during their entire stay.
You’ll need:
- A cardboard box (about the size of a copy paper box)
- Foil
- glue or tape
- 13-15 watt fluorescent spiral bulb
- light socket with plug
- extension cord
- plastic oatmeal lid, or styrofoam plate
- scissors and exacto knife or box cutter
The Assembly:
- Cut a 1 inch hole in the center of your plastic plate or lid and trim it to create a 4-5 inch disk with the hole in the center.

- Position your box on its end and cut a 1 inch hole in the top center of the box.
- Cut ventilation slots on the top, upper sides, and back top of your box (this will aid air flow and allow heat to escape.

- Line the inside of your box with foil, covering all the sides (photo does not show all sides covered yet, obviously) using tape or glue to secure the foil in place.

- Cut the foil away from the top hole and the ventilation holes. Take care to secure the foil by the center hole so no loose foil hangs around the hole (you don’t want it to come in contact with the light bulb, which comes next.)
- Push the base of the light bulb through the hole in the top of the box and place the plate on the box so that the base of the bulb sticks through it as well. Then screw the socket onto the bulb. (I’m sorry I don’t have a better photo of this step, hopefully you get the idea from the photo below.)

- Attach your extension cord and you are good to go!
Place your little peat pot darlings on some kind of saucer so that the bottom of your box doesn’t get wet. Last year, mine managed to get wet anyway – I’m trying to be a little more careful with my watering this year. 🙂
There you have it! Now, a little word of caution: I’m a bit of a freak when it comes to electricity, heat and paper products being in such close proximity to each other, so I am very diligent in checking my box to make sure it’s not getting too hot around the bulb or socket – and it never does. Even so, I never leave this on while I’m away from the house. Just sayin’.
If you decide to make this light hut, I hope you and your plants enjoy it thoroughly!


Great project!
Thanks! We had fun doing it 🙂
Great idea very clever, Good tutorial.
Thank you!
What a great idea…I’ll have to give that a try next year.
Thanks for the comment, Karen. It’s great when you just have a few peat pots to keep warm and bright – just the right size.
I’m going to stick this one in my back pocket for when we eventually live in a place that doesn’t have sunshine 364 days a year! Great project!
Thanks! How nice to have such a sun-shiny place to be! 🙂
We made something similar last year and this year for our seedlings. It worked great, and was actually fun to make.
I contemplated trying something new this year, but this worked so well last year, I figured why mess with a good thing? And yes, it’s also fun to make!
I nominated you for the WordPress Versatile Blogger Award!
http://greenboxgarden.wordpress.com/versatile-blogger-award/
I think I’m going to make this this weekend! Thanks for the great idea!
You’re welcome!
Just what I was looking for! My son made one of these years ago (he used the same Botany book as you children did) and I got to thinking today that it would meet my needs just perfectly. I swore last spring NOT to start seeds indoors this year, but here I am drooling over the seed catalogs and dreaming of a grow box. I can’t afford the “real” ones, but I do recall this one worked very well. I still have the electrical parts too! Thanks for sharing it.
I have a question….Do you close the flaps or leave them open?
Usually I leave them open.
We’re doing this project this week with my daughter for Apologia. 🙂 However, we can’t seem to find a 15W fluorescent spiral bulb. Where did you find yours and did you leave it on 24/7?
Hi Sheree, It’s been a long time, but I’m pretty sure we got ours at Home Depot. We didn’t leave it on 24/7. I would always turn it off when we went out, just to be on the safe side. Thanks for the visit. Hope you enjoyed the project!
We are doing this project now. I am a bit concerned with the whole electricity thing as well. Did you leave it on all night? Or did you turn it off while sleeping?
Hi Cara, yes, I did leave it on all night. I used a fluorescent bulb, so it did not get too hot.
I am planning to do this with 47 homeschool kids. I am not a gardener. I’m wondering what did you grow?