

Over the years since posting our family’s garden enclosure, I have received several comments and emails from readers who have been inspired by the post to create their own versions of the critter-resistant raised garden bed. One such reader, John, was kind enough to send photos of his creation – an amazing enclosure that is both beautiful and functional, including a screened top, cold frame, and a bonus planter.
I asked John to write a brief description of his building process, which he was kind enough to provide, along with these wonderful photos he has given me permission to share here at Clover and Thyme. Every time I see them I get even more antsy for spring to arrive. I hope you will find John’s fabulous enclosure as inspiring as I did.


John writes:
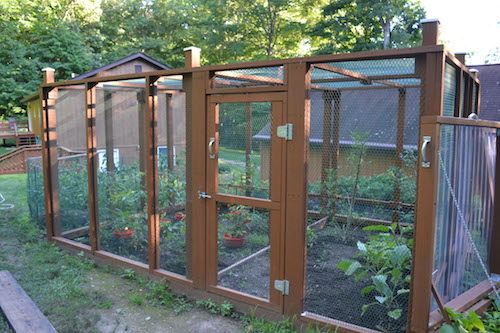
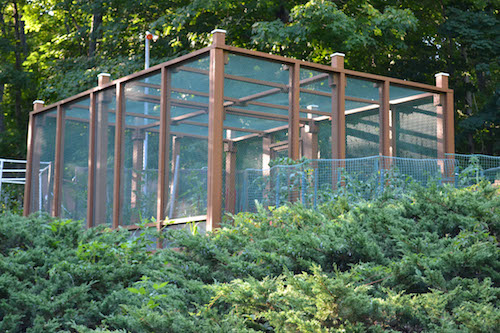
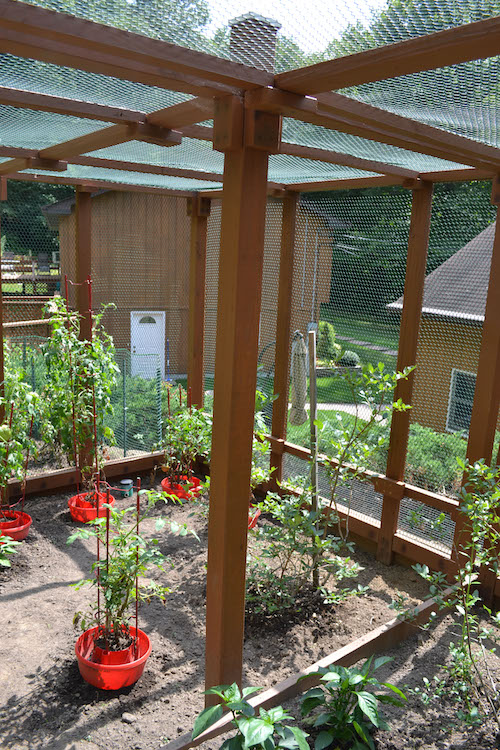
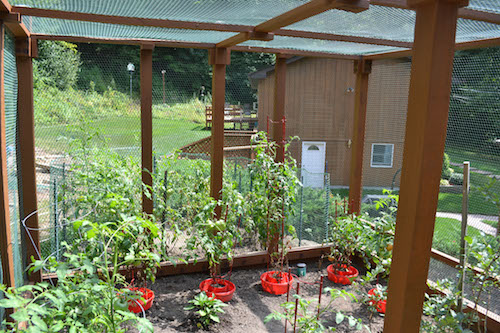
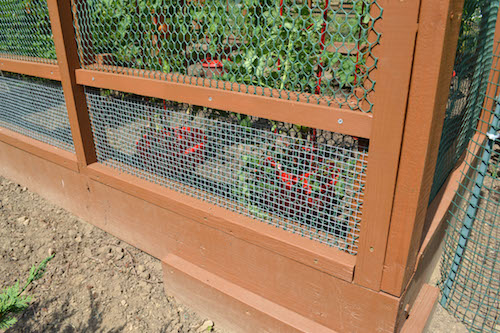
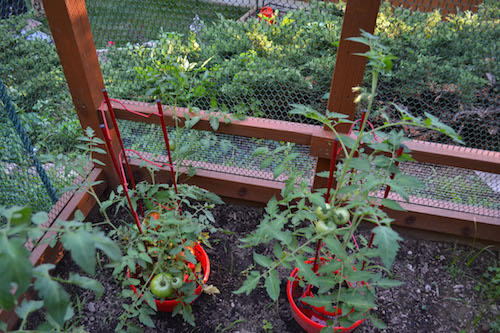
Except for the 4x4s, all of the wood used in the construction of the enclosure was from a 24’ x 21’ pressure treated deck I took down. I first ripped and cut the wood to the correct size then stained it all before putting it together. The deck had been up for 20+ years and a lot of the 2×6 planking was split and checked. Staining it made it look much better and will help preserve it. All of the construction, except of course for stapling the fabric and screen was done using 3-1/2” screws. The trim was adhered with 2-1/2” screws and the nine 4x4s were attached to the 2x8s using a 3/8’x 4-1/2” lag bolt and four 3-1/2” screws. I assembled the base in place using four screws in each corner. I then leveled it by removing dirt where necessary. For additional stability and to adhere the 4×4 to that would support the roof, I installed a 2×8 across the center of the base rectangle. The 4x4s were all buried 7” below the 2×8 base for additional stability. From the dirt floor to the plastic mesh ceiling the headspace is nearly 6-1/2’. I reinforced the rear and right side of the structure a foot high using ¼” steel screen to protect from woodchucks that sometimes ate through my old plastic enclosure to nibble on my vegetables. I only did these two sides because that is where they were getting into my old garden. I will do the other sides if necessary but so far it has not been. As you may note from the photos I placed the screen on the outside of the plastic netting so if animals did try to gnaw through it they would not damage the plastic. The roof was constructed using a 2×4 along the length of the structure attached to a 4×4 on each side and one in the middle. To reduce weight I ripped some 2x6s to an actual width of 2” for supports to staple the netting to. I really was not worried about the weight of the support structure and netting but rather of the additional load that snow would add. The door and most of the trim I think I basically followed your plan. The cold frame and planter I made was the second one I constructed, this time however I elevated it. You can see the other one along the right side of the enclosure. These were also constructed of scrap lumber. I always wanted to enclose this part of my garden and your plan provided the impetus for me to do so. Thanks again for posting it.
When I asked him about the stain he used, he responded:
I used Behr, Semi-Transparent stain. It is the same stuff I use on my cedar sided house and detached garage as well as my house deck. It has a 6 year warranty when used on decks and 8 for fences and siding. It is a good product that is available at Home Depot which the company stands behind. A few years ago I used their wood stripping product to remove 8 years of stain from a small pressure treated deck that is attached to my house. Frankly, it did not work very well so I contacted Behr by email at their Customer Service Department. They responded very quickly and apologized for my inconvenience indicating that what I described sometimes occurred on decks with that many coats of stain. They recommended I use their product that was designed to remove stain from concrete assuring me that it would not damage my deck and offering to reimburse me for purchase of this product. I took their advice and the stronger stuff worked great.
Thank you, John, for sharing your amazing craftsmanship!
Do you have a garden enclosure you would like to share here at Clover and Thyme? Feel free to contact me!

2 thoughts on “Garden Enclosure Inspiration”